Tuesday 26 August 2014

iPad tricks

Take a screenshot
If you need a screenshot, whether it's to prove your high score in a new game or to send an important chart to the office, taking one is quick and easy. Press and hold the Sleep/Wake button and the Home button at the same time. The screenshot will be added to your camera roll.
 

 Tap titlebar to return to top
Scrolling all the way up to the top of a long page can be irritating. That's why Apple included a shortcut: just tap on the title bar at the top of the screen to automatically jump to the top. This should work across most apps,
 

 Fast app switching
If you have followed the tips above then you will have seen this by now. Switching apps quickly is very easy. It's not necessary to close one app and then scroll through your apps to find the one you want. Just open the iPad's multitasking menu by swiping upwards with four fingers or double-tapping the home button. You'll see all of your recently opened apps. Scroll right and you'll see even more. Just tap the one you want to switch quickly. This is especially useful if you want to copy-and-paste between one app and another. Swipe one up to quite it.

 Copy/Paste
This is a tremendously useful feature. If you need to copy text between, say, a document and an email, just tap and hold on the text you want to copy. The word you have tapped will be highlighted and you'll see a bar with a blue circle on it at each end of the word. Drag these bars to select the text you want and then tap 'copy'. Then go to the app you want to paste the text into, tap and hold and then hit 'paste'.

 Zoom

Want to see something close up, then this feature might be for you.
This feature sits in the accessibility folder under general settings. when turned on, double tap on the screen with three fingers to zoom into a spot.
To navigate around while zoomed in, drag three fingers around the screen.
And if things still are not magnified enough, then double tap again while zoomed in with three fingers before dragging them up or down. This will zoom you right in and out of the action.

 Shake to undo
Made a mistake when typing and wish there was a handy undo button just like on your desktop word processor. Actually there is, but you have to get physical.
Simply pick up your iPad, hold it tightly and give it a rigorous shake. A box will flash up on the screen asking if you would like to undo the typing you have just inputted.

Double click the home button
Double click of the home button will bring up the multitasking bar, allowing you to access apps that are open, place a finger on them and the Apps will jiggle. Press the small x to close down an app in the bottom bar.

Reboot
Hold down the Sleep/wake Button and the Home Button  for about 15 seconds or until the screen goes black and the Apple logo appears. Wait a while and slide to switch on. all open Apps which are slowing down your system will be closed.

Tuesday 19 August 2014

HP X360 removing the base enclosure

Removing the base enclosure

WARNING:Make sure the computer is disconnected from power before starting.
Follow the steps in this section to remove the base enclosure.
Step 1

Remove the two rubber feet from the rear corners of the base enclosure.
Removing the rubber feet
Step 2

Remove four screws that secure the base enclosure to the top cover.

NOTE:The four screws in this step and the seven screws in the next step are different sizes. Take care to keep them separate for reinstallation.
Four screws locations
Step 3

Remove seven more screws that secure the base enclosure to the top cover.
Seven screw locations
Step 4

Starting with the edge of the base enclosure near the power button, carefully release the retention clips on the outer edges of the base enclosure from the top cover.
Releasing the retention clips
Step 5

Lift the base enclosure off the computer by prying it up and lifting...
Lifting and removing the base enclosure
...taking care to flex the base enclosure as necessary to remove the enclosure from over the HDMI connector.HDMI connector in the base enclosure
Step 6

Lift the base enclosure until you have access to the ribbon cable and its connector.
Base enclosure lifted to access ribbon cable and its connector
Step 7

Carefully lift up the locking bar on the connector.

CAUTION:Use care to prevent damaging the connector and ribbon cable.
Lifting the locking bar on the connector
Step 8

Remove the cable from the connector, and lift off the base enclosure.
Disconnecting the cable

Replacing the base enclosure

Use the steps in this section to replace the base enclosure.
Step 1

If installing a new base enclosure, remove the USB board from the inside of the old enclosure and install it on the inside of the new base enclosure.
USB board on the inside of the base enclosure
Step 2

Place the base enclosure over the computer so that the USB cable can be reconnected.
Holding the base enclosure open to access the ribbon cable and connector
Step 3

Insert the ribbon cable in the connector and push down on the locking bar to secure it.
Reconnecting the cable
Step 4

Replace the base enclosure ensuring that the HDMI connector fits in its intended opening on the side of the base enclosure...
HDMI connector in the base enclosure
...and lower the base enclosure onto the computer.Lowering the base enclosure into place
Step 5

Press down on the edges of the enclosure to snap it into place.
Snapping the cover into place
Step 6

Replace seven screws that secure the base enclosure.
The seven screw locations
Step 7

Replace the other four screws that finish securing the base enclosure to the computer.
The four screw locations
Step 8

Replace the two rubber feet.

Tuesday 12 August 2014

Western Digital , Blue, Green, Black or Red what is the difference ?

Nothing beats a SSD Drive for performance but mechanical drives by Western Digital are much cheaper.

WD Blue
These are your baseline drives; typical power consumption, solid performance, good price. If none of the specific features of the other types stand out then these are the ones you want, they're ideal as capacity drives for a desktop for example.

WD Green
These are all about saving energy; they're not actually all that slow in practice for things like streaming, but for more random read/write they lag behind a bit, again not by all that much. The main benefit is that they save power and wear by spinning down when they can, this means they're basically best for things like backup drives which are only in use periodically (e.g - once an hour), if they're made to spin up too often then you obliterate any potential savings you could make, at which point you've got a slightly slower Blue.

WD Black
These are pure performance drives, all about speed. Their top speed for streaming isn't that much further ahead than a blue drive, but the main difference comes from it being generally more responsive. Basically if all you want is speed, but you can't afford an SSD with the capacity you need, then WD Blacks are for you. A good value gaming system can do well with an affordable SSD for OS and a few other bits and pieces you can fit, with a WD Black as your main drive for your games, for example by moving your Steam folder onto it, giving you good all round performance and capacity.
They also now have generous warranties (5 years), they're basically WD Red+, if you can take advantage of the extra performance that is.

WD Red
I think of these as a hybrid between Greens and Blacks; their power consumption is really good, but unlike the Green which is designed to save power between uses, the Reds are designed to just spin constantly for continual use/availability. They're quiet, responsive, and have good speeds, but most importantly they have an extended (3 year) warranty.
You could use them as system drives and they'd perform just fine, but you probably wouldn't be getting the most of their cost; they're ideal for often used NAS devices, I also like them for RAID setups, particular RAID-5 and RAID-6 since a bunch of them doesn't use tons of power, but they're responsive enough to handle the distributed blocks of data, parity writes etc.


So to summarise:
WD Black = Speed/high end use, extended warranty.
WD Blue = General use.
WD Green = Energy saving for backups or other less frequent use.
WD Red = Some energy saving, continual use, extended warranty, ideal for RAID.

Thursday 24 July 2014

BSOD Unexpected Kernel Mode Trap and Mcafee Total Protection 2014

I have been suffering a crash and immediate reboot losing current data with  A BSOD (Blue Screen of Death)  0 x 1000007F Unexpected Kernel Mode Trap and the suggestion from forums what to do .
I checked the graphics card, RAM, hard drives using the Dell hardware utility stress tests.
All drivers were up to date.
I had restored my PC back from available Windows updates but no change.

A utility for explaining a  BSOD (Blue Screen of Death)  0 x 1000007F Unexpected Kernel Mode Trap showed that  a mfehidk.sys was recorded in the log which is a McAfee Total Protection 2014 .This  file is a link driver and leads me to believe that the BSOD which occurs when I try to drag and drop files or move up to the root directory was probably caused by the McAfee anti virus product.
Disabling the McAfee functions seemed to cure the problem immediately
Contacted their technical support who did seem to be familiar withy this problem. They found that Microsoft Security Essentials was also running which is not a good idea having two AV software running.
They then checked the Network Driver for updates which was found to be up to date.
Running the McAfee virtual technician showed no problems.
It was however suggested that a complete removal and reinstall would be necessary and offered to do this remotely for me.
The Remote assistance removed all McAfee products using mcpr.exe and rebooted.
They set up a reinstallation link on the desktop and serial number and asked me to reinstall and see if the error reoccurs.
July 2014 everything has been OK.
To  clean and re-install Mcafee Total Protection 2014  I have detailed a home use procedure below.


Mcafee removal tool download

Uninstall your McAfee home user products using Add/Remove Programs in the Windows Control Panel: 

Windows 8 Users
Close all McAfee program windows.
In the Start screen, type Programs and Features. (If it is not visible, click Settings in the list on the right.)
Click Programs and Features in the list on the left.
Select McAfee SecurityCenter.
Click Uninstall and follow any on-screen prompts.


Windows 7 and Vista users
Close all McAfee program windows.
Click Start, Search, type Programs and Features, and click Go.
Double-click Programs and Features.
Select McAfee SecurityCenter.
Click Uninstall and follow any on-screen prompts. 


Download and run the McAfee Consumer Product Removal (MCPR) tool:
Download the MCPR tool from: http://download.mcafee.com/products/licensed/cust_support_patches/MCPR.exe and save it to a folder on your computer.

IMPORTANT: The MCPR tool is updated periodically when new products and updates are released. Always download a new copy of the MCPR tool before using it to uninstall your product.

Navigate to the folder where you saved the file, and double-click MCPR.exe. 
When you see the User Account Control dialog box, click Yes.
At the McAfee Software Removal screen, click Next.
At the End User License Agreement (EULA) dialog box, click Next to accept the agreement.
When prompted, type the Captcha information, which is case sensitive, to validate to application security, and then click Next.
If you have Family Protection installed, type your Administrator user name and password and click Next.
If you cannot authenticate, follow the on-screen instructions to obtain an uninstall code. If you do not have Family Protection installed, you will not receive this authentication prompt.
When you see the message CleanUp Successful, restart your computer. Your McAfee product will not be fully removed until after the restart. 

Sunday 22 June 2014

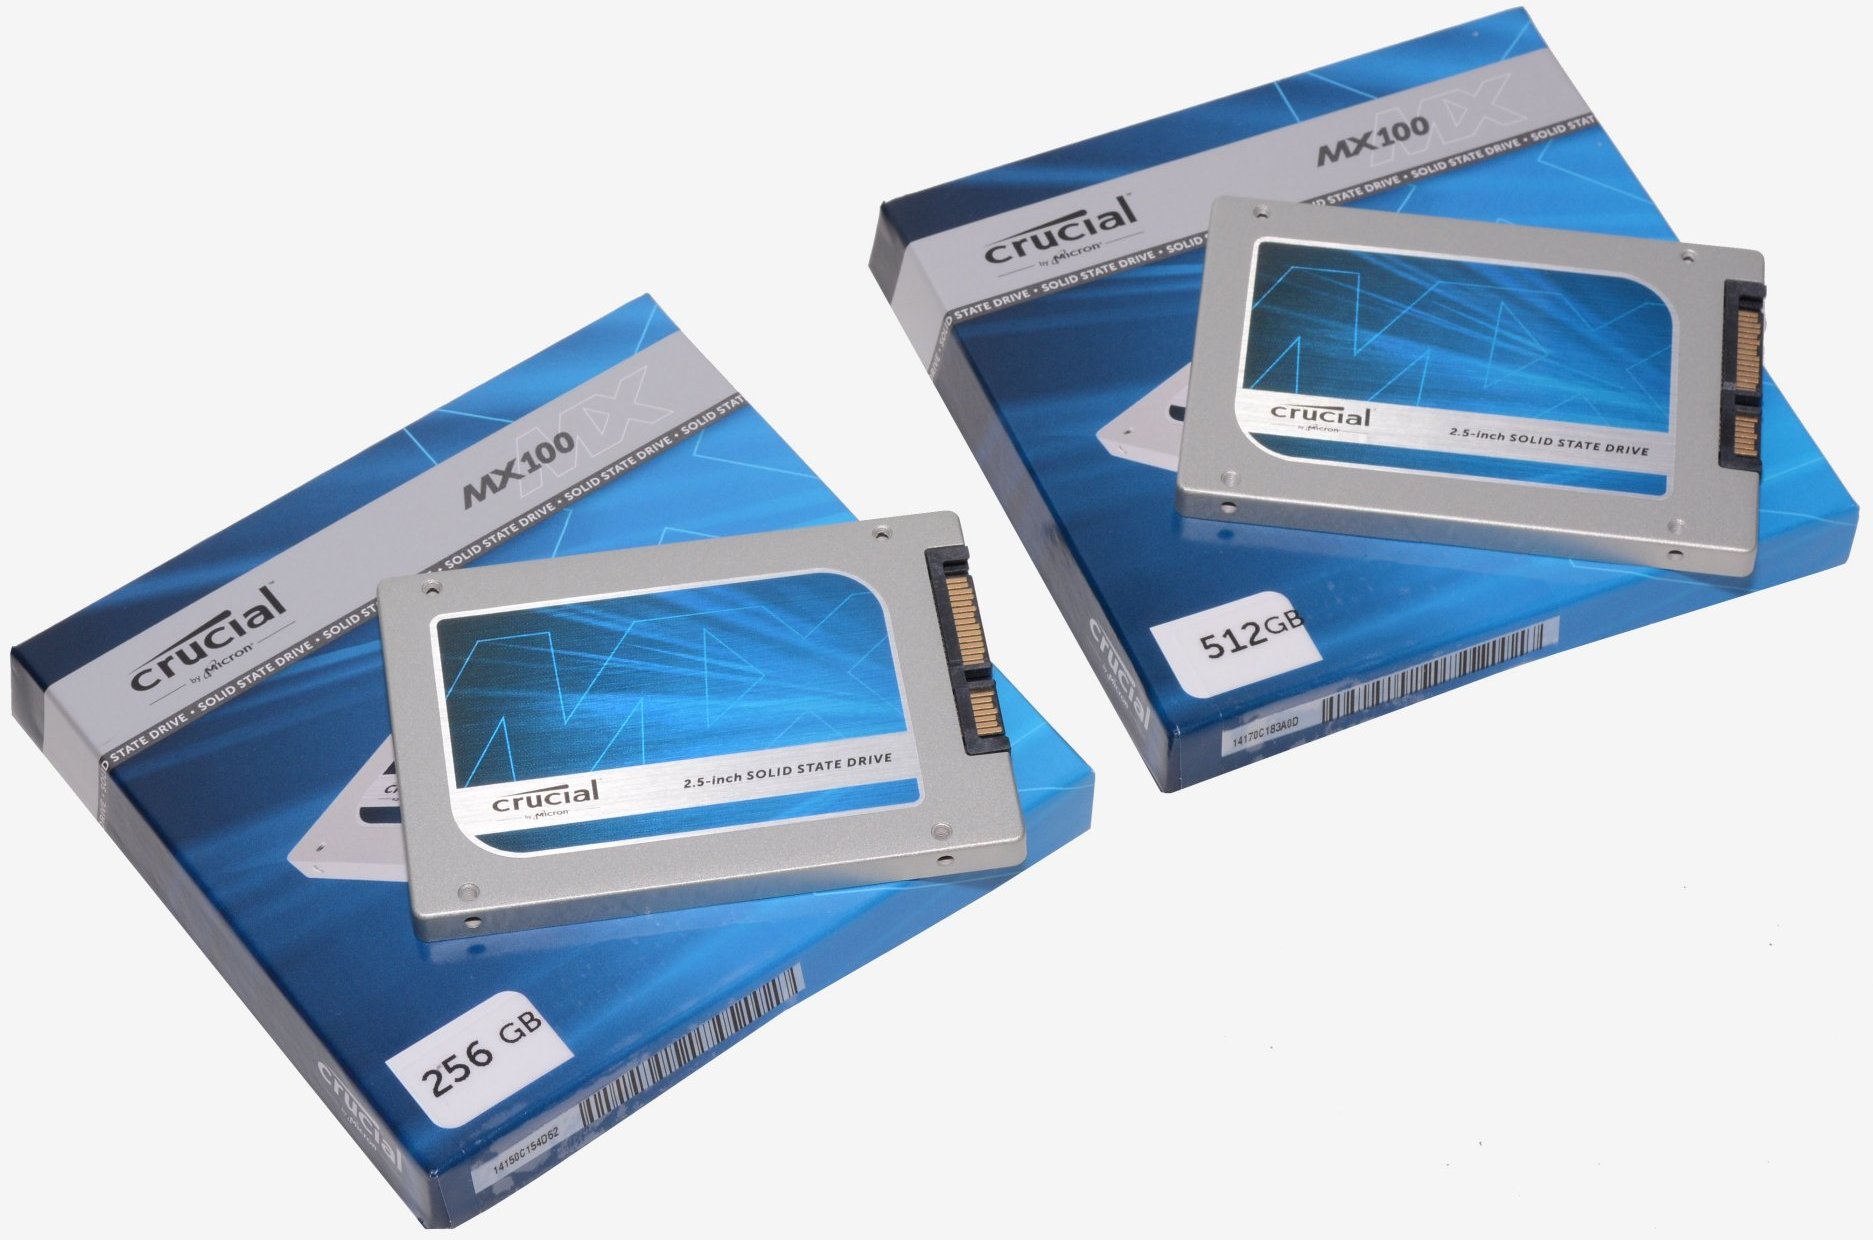
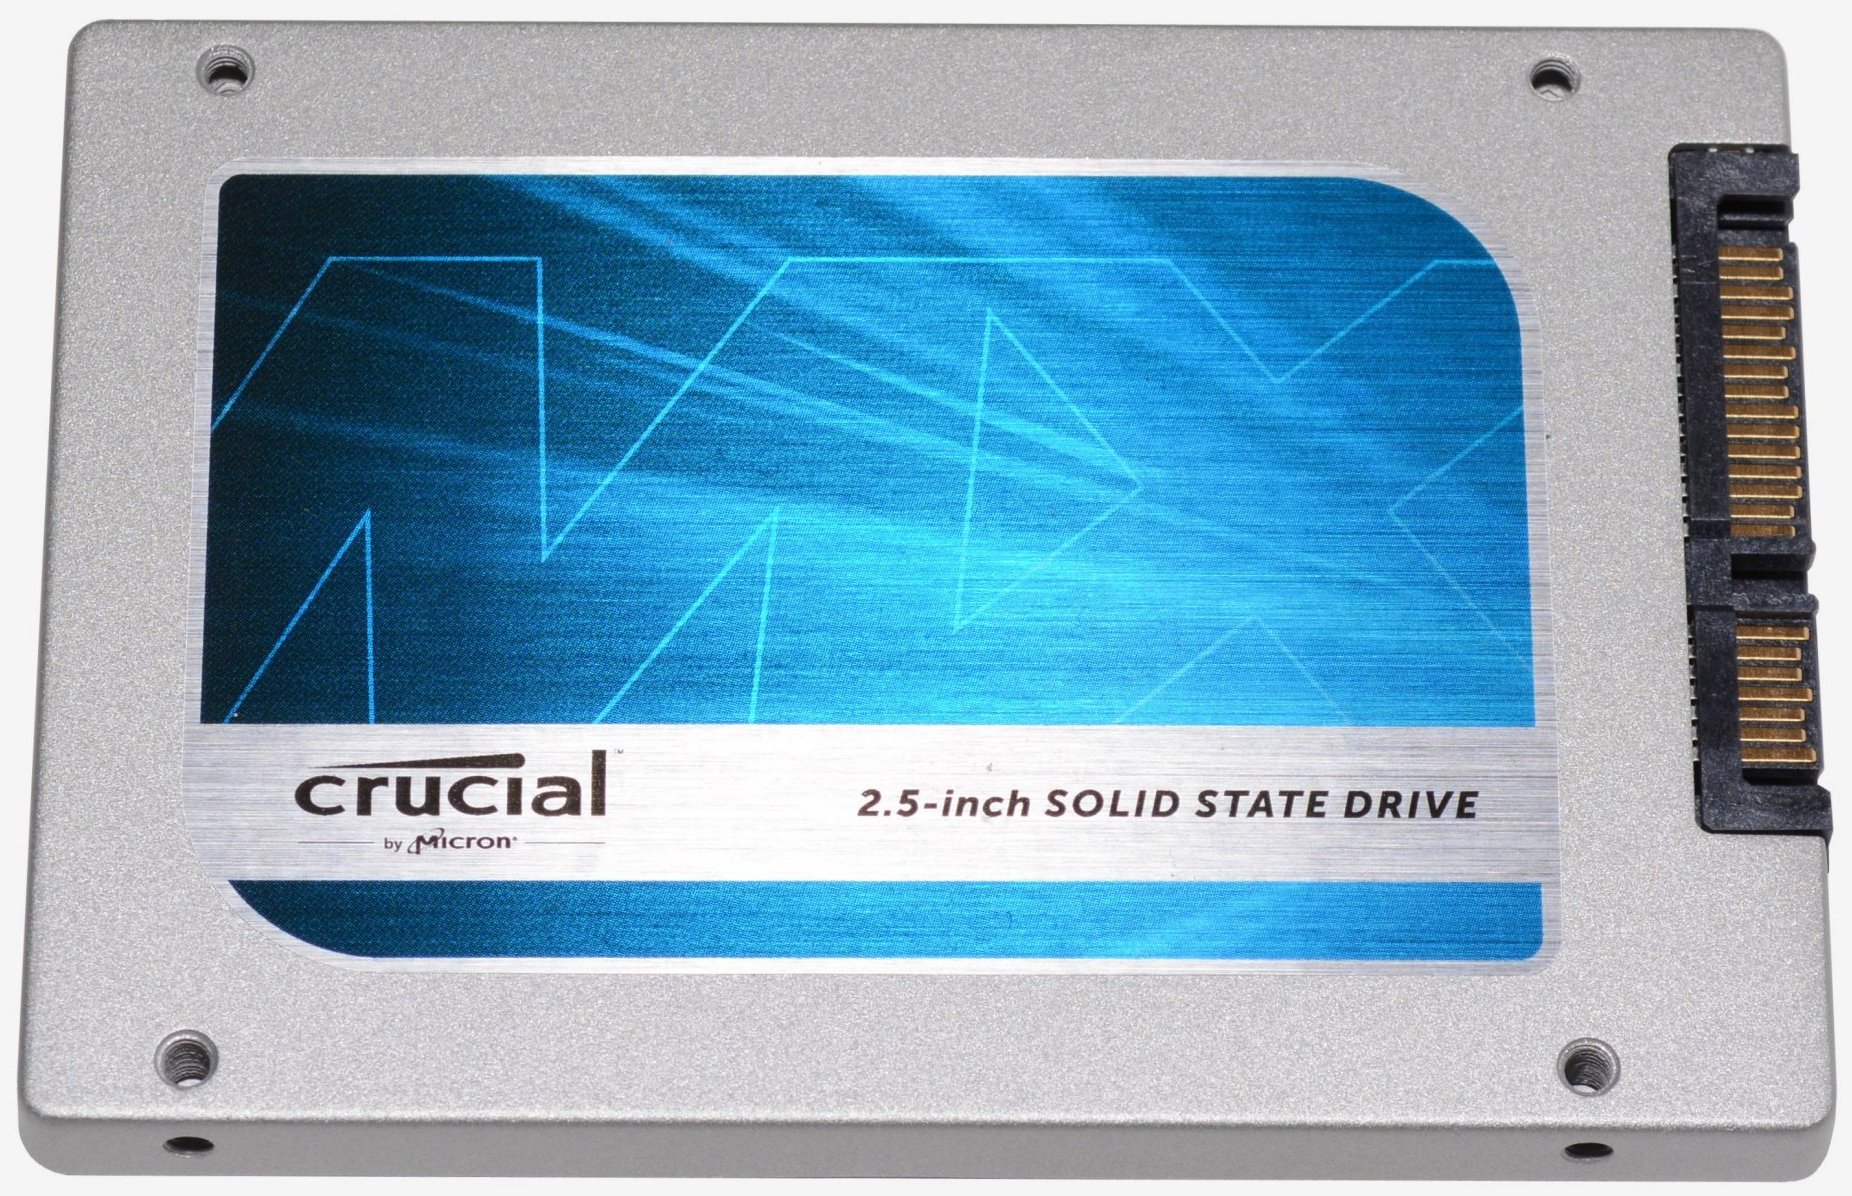
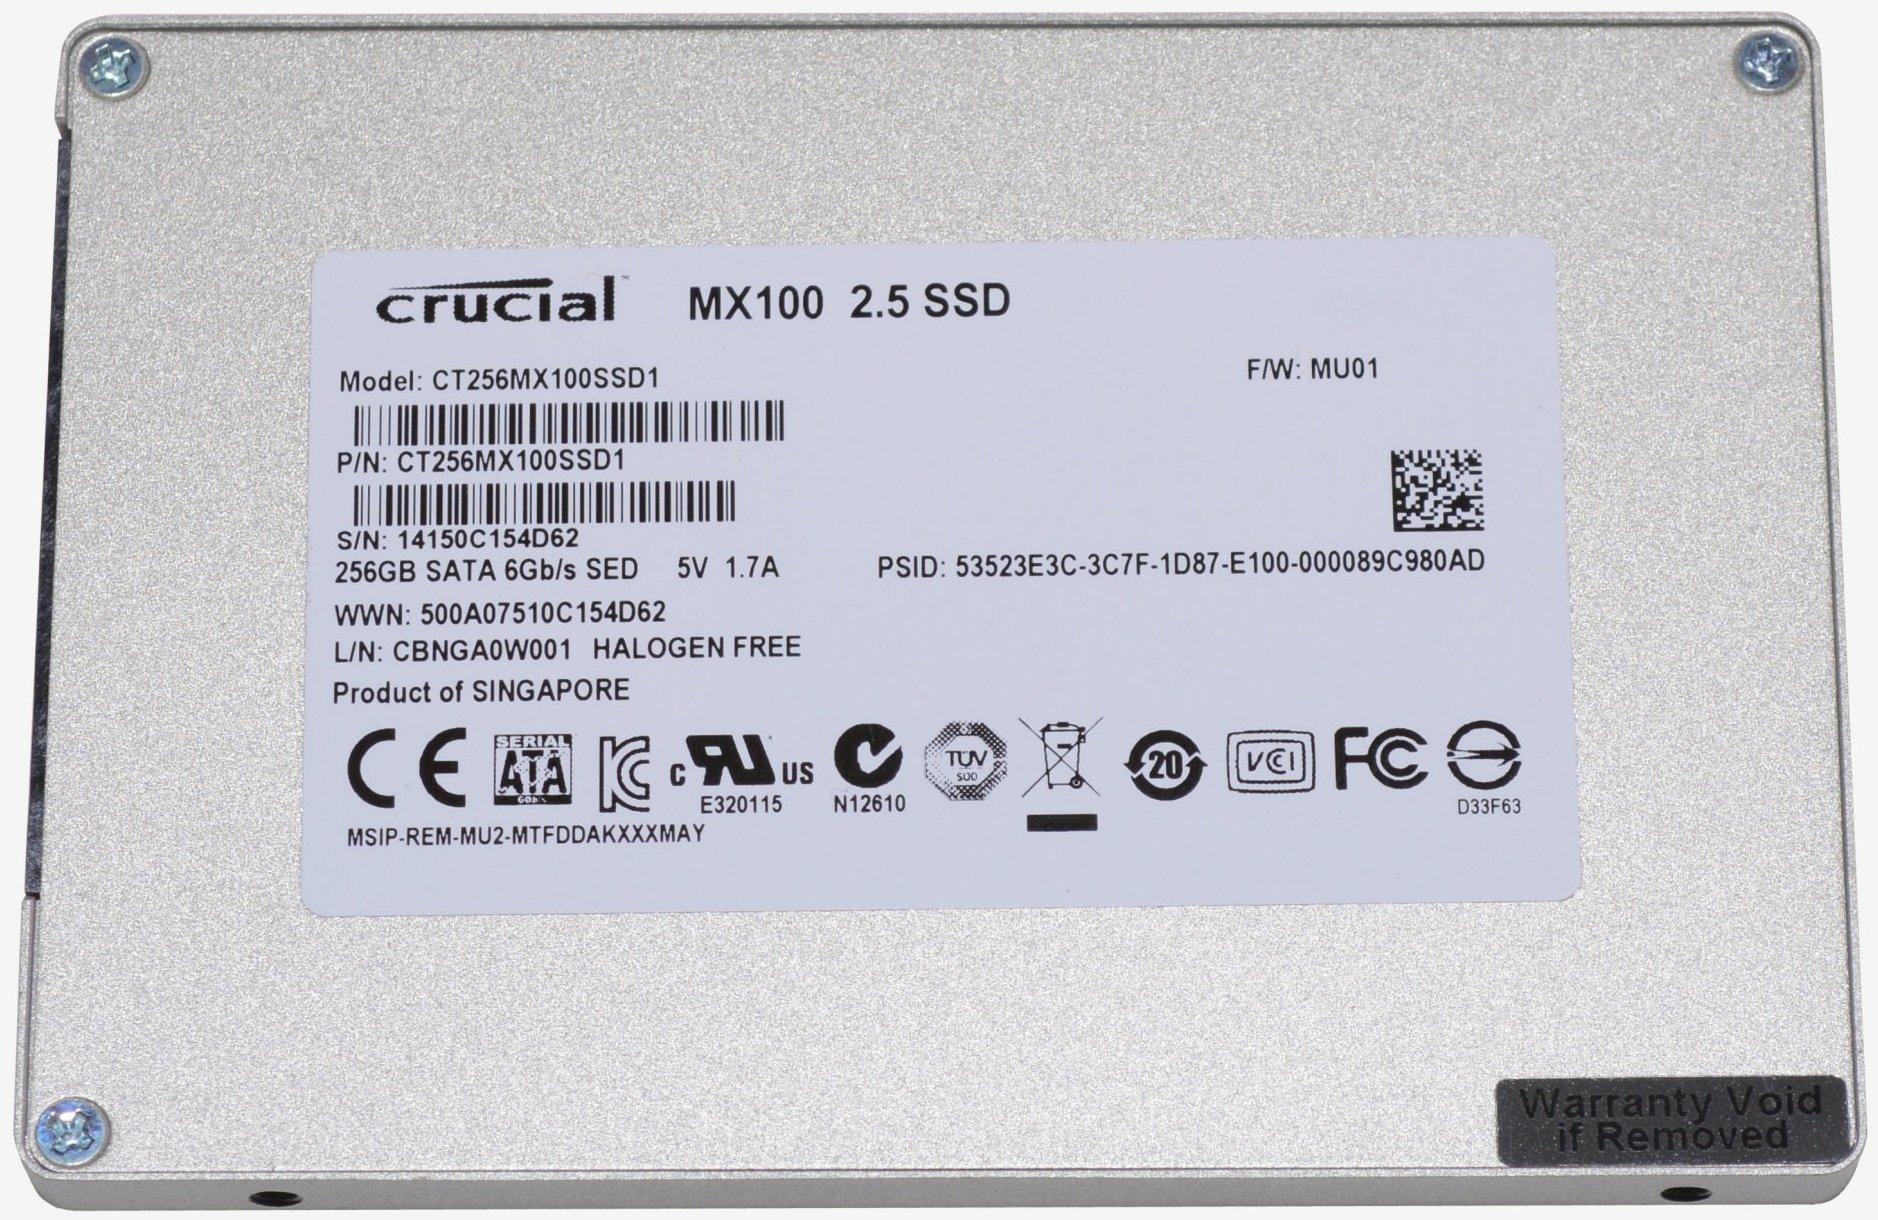
Crucial MX100 256GB SSD


Famed for its quality memory modules, Crucial has also become a trusted name in the solid-state drive business. Its RealSSD C300 made waves back in 2010 as the first consumer SSD series to natively support 6Gb/s SATA, though at $600 for the 256GB model, it was too pricey for most.
The company has since offered various successful upper-end products, including the M4 (2011's C300 successor) as well as the M500/M500DC for enthusiasts and data centers. However, Crucial's entry-level efforts have been less than laudable to date. In fact, the biggest hitch along the company's road has been its budget-minded v4 series.
There are really only two ways to make an affordable SSD: using a cheap controller or cheap NAND flash. The v4 series had the former -- the Phison PS3105 from parent company Micron -- but the controller was so bad that the drive was unusable, constantly pausing on Windows 7. It was worse than the stuttering of early SSDs.

With the woes of the v4 series behind it, Crucial is taking another crack at producing a cost effective SSD and things look more promising this time.
Instead of a cheap controller, Crucial has outfitted its MX100 SSDs with the same Marvell chip used by the high-performance M550, then used more affordable 16nm NAND flash rather than the M550's pricier 20nm solution. This makes for a relatively small difference in quoted read/write performance while seriously denting the M550's MSRP.
The M550 series costs $0.78 per gigabyte for the 128GB model, $0.64 per gigabyte for the 256GB model and $0.59 per gigabyte for the 512GB model. While those rates are great for today's standards, Crucial has managed to shave up to 35% off the price when looking at the 256GB model and at least up to 20% off other models with the MX100 series.

Crucial MX100 in Detail

Whereas the M500 has a 960GB model and the M550 series goes up to 1TB, the MX100 is limited to 512GB. Making an affordable 1TB SSD probably doesn't make much sense for Crucial right now, so we are not surprised to find this capacity cap.
Crucial claims the MX100 can achieve read speeds of up to 550MB/s, which is enough to max out the SATA 6Gb/s bus. Write speeds vary between models with the 128GB iteration starting at 150MB/s, followed by the 256GB at 330MB/s. The 512GB version touts a write throughput of 500MB/s, the same figure claimed by the M550 series.

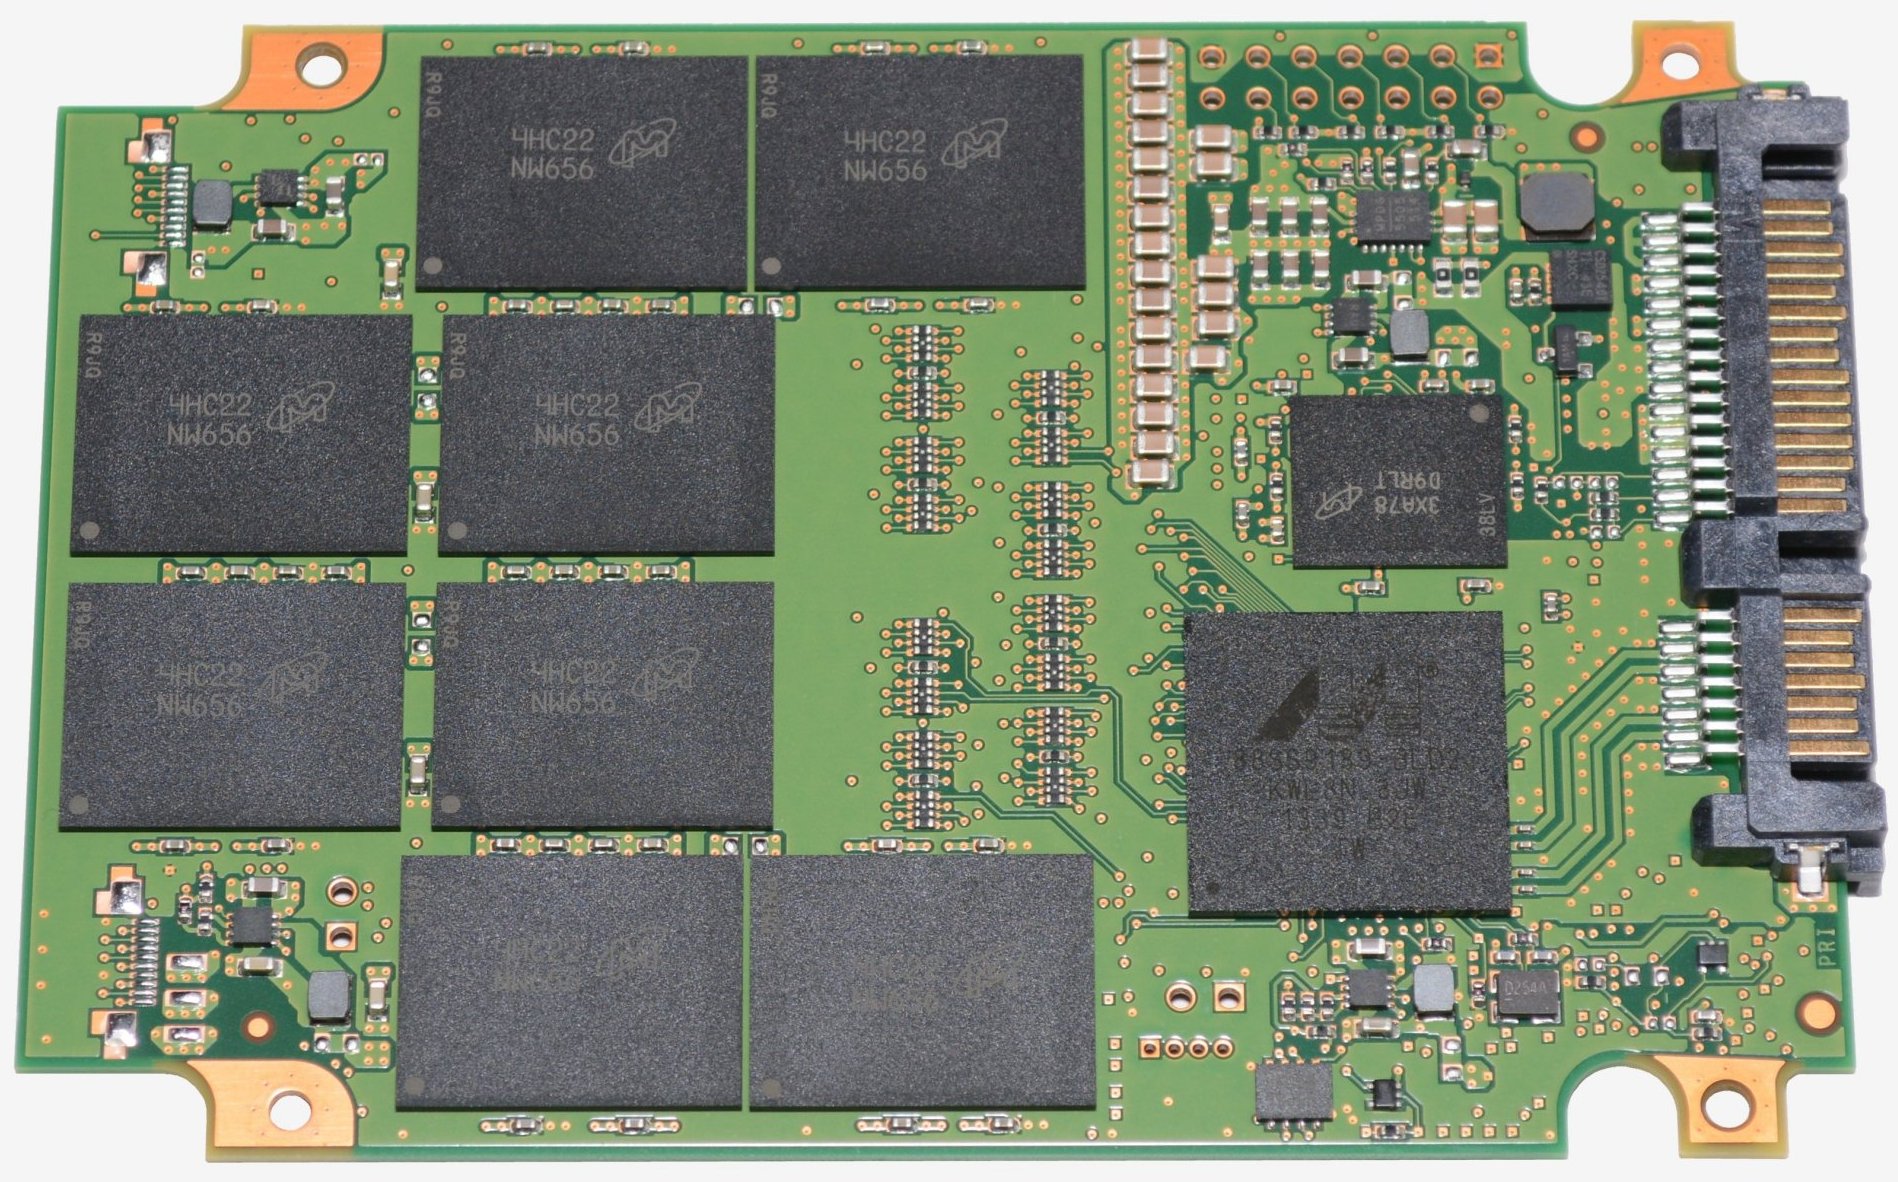
Crucial's new drive utilizes the tried and true Marvell 88SS9189 controller along with a Micron cache to improve small write performance and eliminate any stuttering issues.

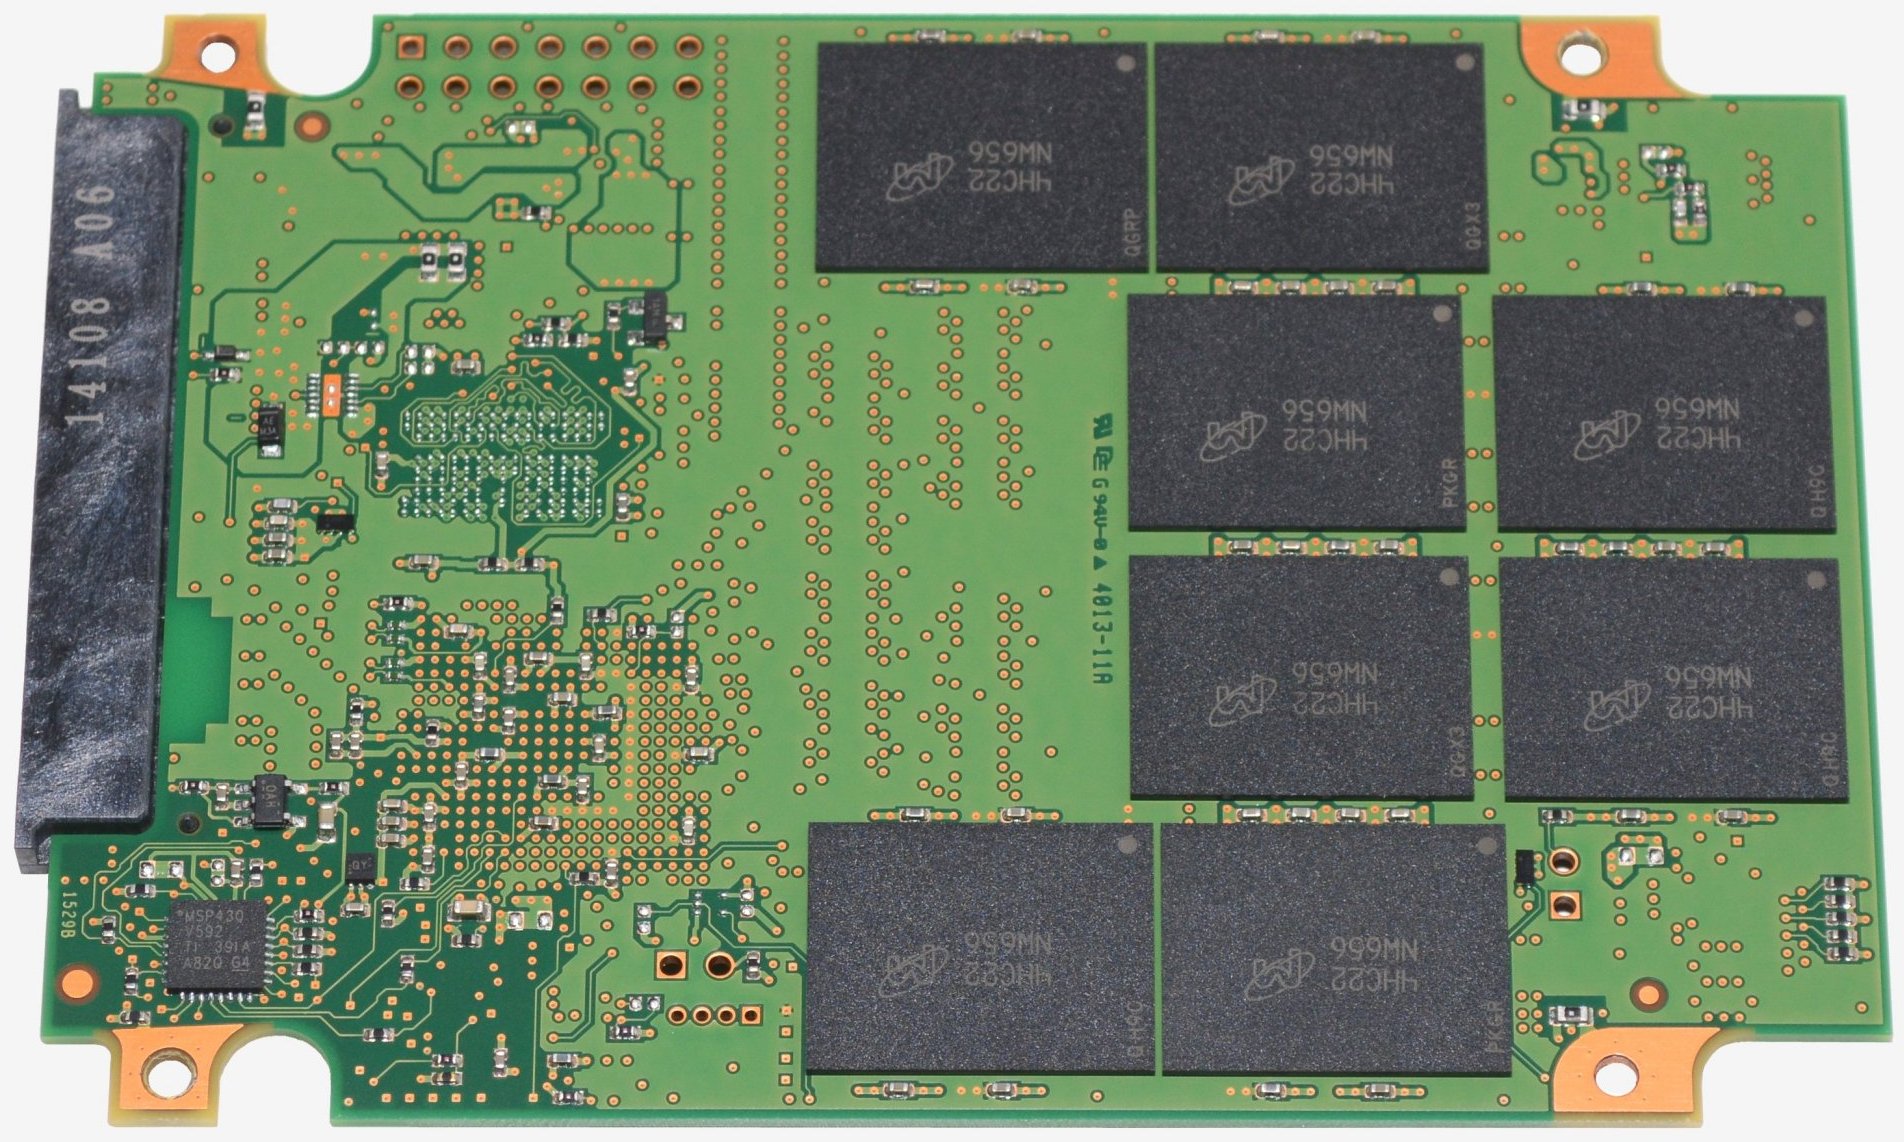
The MX100's flash NAND memory (16nm 128Gbit MLC) is made by Micron, parent company of Crucial. This is the first mainstream product to use 16nm NAND. Crucial says the MX100 series can sustain a total of 72TB worth of writes before failing and is backed by a three-year warranty. That is a huge amount of writes, equivalent to 40GB per day for five years, which is well above what the average user will require.
The MX100 offers AES 256-bit encryption on hardware and is one of the only SSDs available that meets Microsoft eDrive, IEEE-1667, and TCG Opal 2.0 standards.

In terms of physical durability, a typical shock resistance of 1500G is part of the spec sheet. The MX100 can operate reliably at temperatures of up to 70 degrees Celsius and will survive 85 degrees when non-operational.
Like all SSDs, the MX100 should consume very little power. At idle, all three models use less than 100mW. When active they typically consume just 150mW. Crucial also states that the maximum amount of power these SSDs can consume is 3700mW for the 256GB and 4200mW for the 512GB model when working with 128KB data.

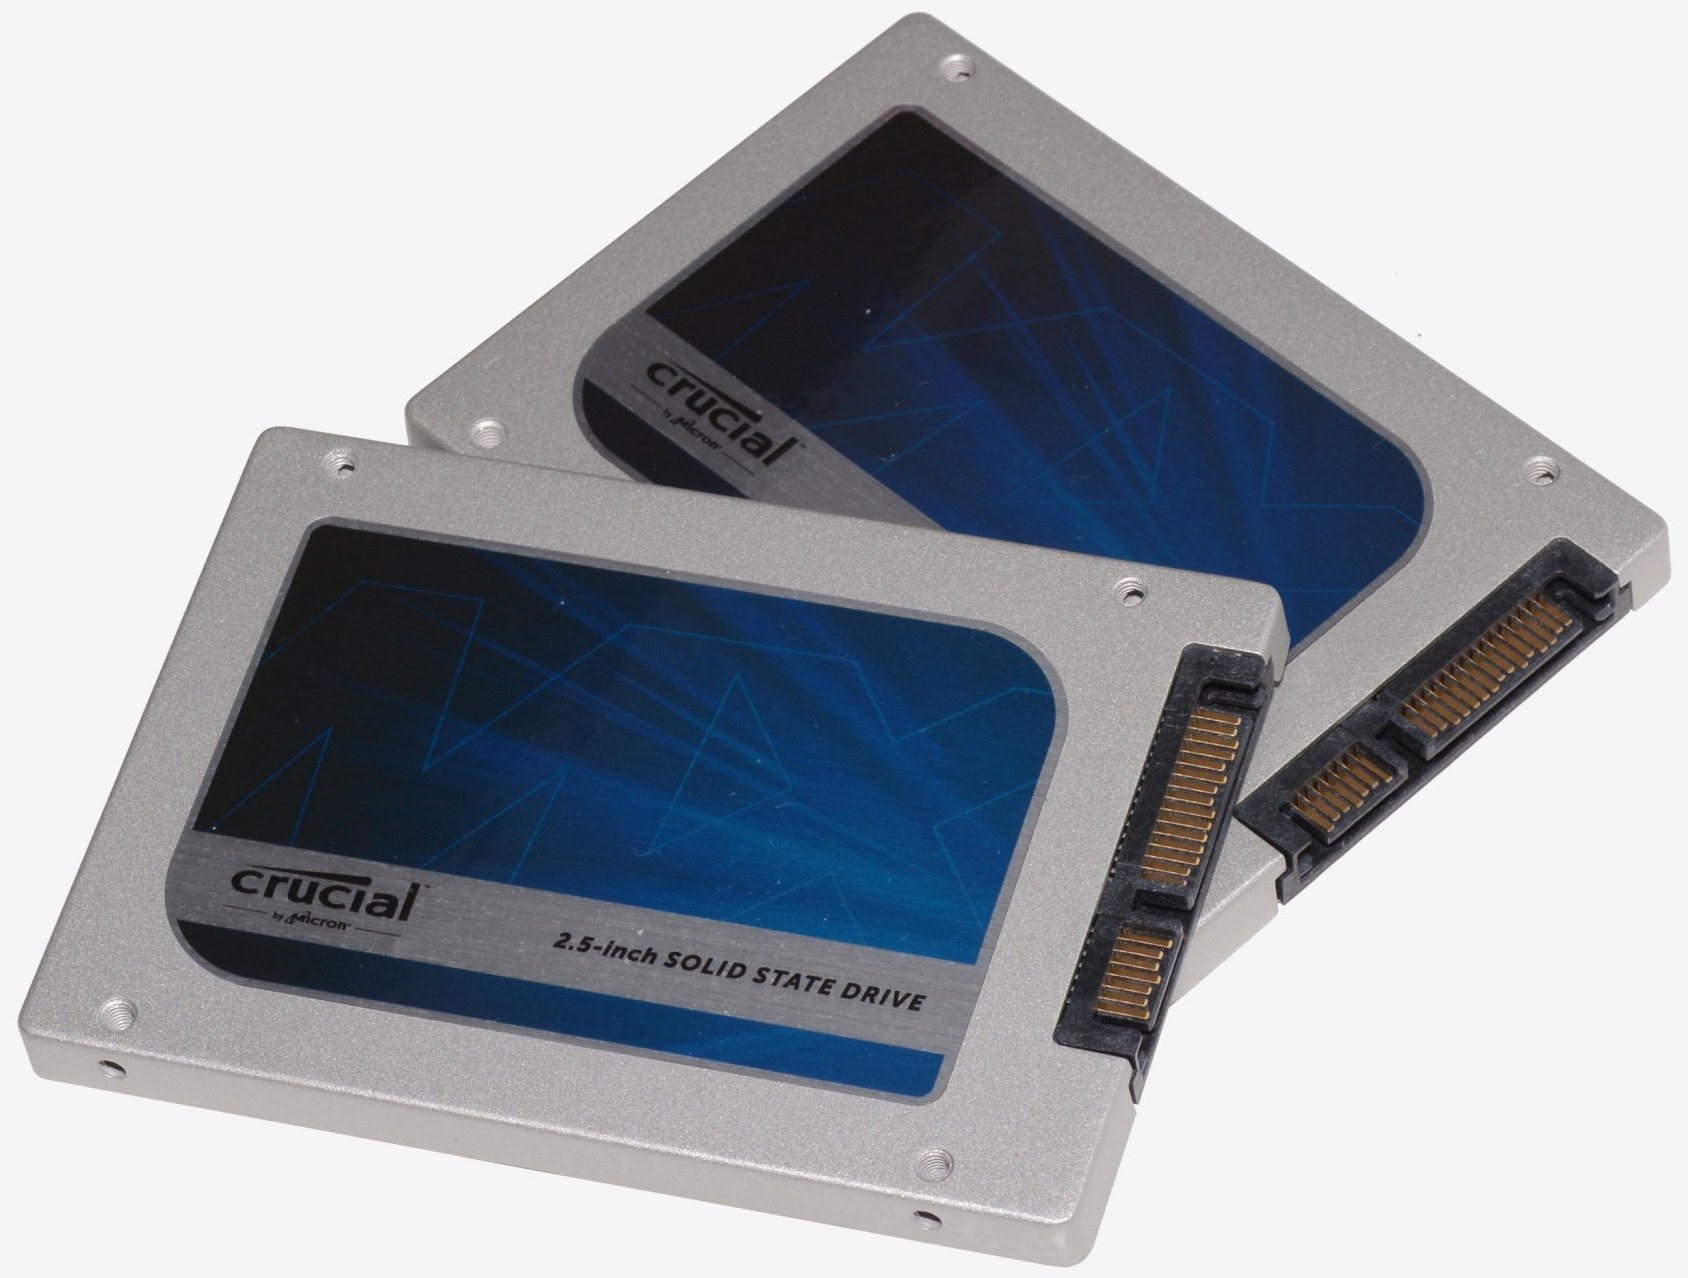
The MX100 series measures 100.45mm long, 69.85mm wide and just 7mm thick while weighing 70 grams. Crucial has included a spacer for systems that require the drive to be 9mm thick. The drives are compatible with both laptops and desktops, though you'll need an adapter if your chassis doesn't have a 2.5" bay. They'll also work in RAID if you buy more than one and are still backed by a limited three-year warranty.
The only area where Crucial is lacking compared to competitors such as Samsung is in software. Samsung's SSD Magician utility is excellent, allowing users to optimize their SSD, clean it, measure performance, easily apply firmware updates, monitor health and track other statistics. Crucial offers no such software for any of their SSDs, so this is certainly somewhere to improve.

Friday 20 June 2014

After BSOD check Windows System files using sfc /scannow

The sfc scannow option is one of several specific switches available in the sfc command, the Command Prompt command used to run System File Checker. Sfc /scannow is the most common way that the sfc command is used.
Sfc /scannow will inspect all of the important Windows files on your computer, including Windows DLL files. If System File Checker finds an issue with any of these protected files, it will replace it.
Follow these steps for using sfc with the scannow option to repair important Windows files:
Difficulty: Easy
Time Required: Using sfc /scannow to repair important Windows files usually takes 5 to 10 minutes.

Here's How:

  1. Open Command Prompt as an administrator, often referred to as an "elevated" Command Prompt.
    Important: For the sfc /scannow command to work properly, it must be executed from an elevated Command Prompt window in Windows 8, Windows 7 and Windows Vista. This is not required in previous versions of Windows.
  2. Once Command Prompt is open, type the following command and then press Enter.
    sfc /scannow
    
    Note: There's a space between sfc and /scannow.
    Important: If you're trying to use System File Checker from the Command Prompt available from Advanced Startup Options or System Recovery Options, see Tip #1 at the bottom of the page for some changes in how you execute sfc /scannow.
  3. System File Checker will now verify the integrity of every protected operating system file on your computer.
    Note: In some situations, especially in Windows XP and Windows 2000, you may also need access to your original Windows installation CD or DVD.
  4. Restart your computer if sfc /scannow did actually repair any files.
    Note: System File Checker may or may not prompt you to restart but even if it doesn't, you should restart anyway.
  5. Repeat whatever process caused your original problem to see if sfc /scannow corrected the issue.

Tips:

  1. When running sfc /scannow from outside of Windows, like from the Command Prompt available when you boot from your Windows disc or flash drive, or from your System Repair Disc or Recovery Drive, you'll have to tell the sfc command exactly where Windows exists, as in this example:
    sfc /scannow /offbootdir=d:\ /offwindir=d:\windows
    
    The /offbootdir= option specifies the drive letter, while the /offwindir= option specifies the Windows path, again including the drive letter.
    Note: Depending on how your computer is setup, the Command Prompt, when used from outside of Windows, doesn't always assign drive letters in the same way that you see them from inside Windows. In other words, Windows might be at C:\Windows when you're using it, but D:\Windows from the Command Prompt in System Recovery Options.
    In most installations of Windows 8 and Windows 7, C: usually becomes D: and in Windows Vista, C: is usually still C:. To check for sure, look for the drive with the Users folder on it - that will be the drive Windows is installed on, unless you have multiple installations of Windows on multiple drives.
  2. Having trouble using sfc /scannow? See Get More Help for information about contacting me on social networks or via email, posting on tech support forums, and more.

Saturday 17 May 2014

How to check if a computer that you are using has the 5 GHz network capability.

On the Command Prompt window, enter “netsh wlan show drivers” then press [Enter].
Step 3:
Look for the Radio types supported section.  If it says that the network adapter supports both  802.11a and  802.11n network modes, it means that the computer that you are using has the 5 GHz network capability.
In this example, the wireless adapter supports 802.11b, 802.11a, 802.11g, and 802.11n network modes.  This means that the computer has the 5 GHz network band capability.

On the Medion PC with a Linksys WUSB6300 Adaptor

C:\Users\Terry>netsh wlan show drivers

Interface name: Wireless Network Connection 3

    Driver                    : Linksys WUSB6300
    Vendor                    : Linksys LLC
    Provider                  : Linksys LLC
    Date                      : 14/06/2013
    Version                   : 1023.8.524.2013
    INF file                  : C:\Windows\INF\oem14.inf
    Files                     : 2 total
                                C:\Windows\system32\DRIVERS\RTWlanU.sys
                                C:\Windows\system32\drivers\vwifibus.sys
    Type                      : Native Wi-Fi Driver
    Radio types supported     : 802.11n 802.11n 802.11b 802.11g 802.11a
This supports 5GHz if the VirginMedia router is set to 5GHz

And

Interface name: Wireless Network Connection 2 This is the Edimax USB Wireless 802.11n Adapter

    Driver                    : 802.11n USB Wireless LAN Card
    Vendor                    : Ralink Technology, Corp.
    Provider                  : Ralink
    Date                      : 05/08/2009
    Version                   : 3.0.3.0
    INF file                  : C:\Windows\INF\oem13.inf
    Files                     : 4 total
                                C:\Windows\system32\DRIVERS\netr28u.sys
                                C:\Windows\system32\drivers\vwifibus.sys
                                C:\Windows\system32\RaCoInst.dll
                                C:\Windows\system32\RaCoInst.dat
    Type                      : Native Wi-Fi Driver
    Radio types supported     : 802.11b 802.11g 802.11n
This adaptor does not work on the VirginMedia router unless set to 2.4GHz setting


Question: What is Dual Band Wireless Networking?
Answer: In Wi-Fi wireless networking, dual band is the capability to transmit on the 5 GHz band of 802.11a and also the 2.4 GHz band used by 802.11b, 802.11g, and 802.11n. Unlike ordinary Wi-Fi equipment that only supports one signal band, dual-band gear contain two different types of wireless radios that can support connections on both 2.4 GHz and 5 GHz links.

Friday 16 May 2014

Wireless Standards 802.11

There are several specifications in the 802.11 family:
  • 802.11 — applies to wireless LANs and provides 1 or 2 Mbps transmission in the 2.4 GHz band using either frequency hopping spread spectrum (FHSS) or direct sequence spread spectrum (DSSS).
  • 802.11a — an extension to 802.11 that applies to wireless LANs and provides up to 54-Mbps in the 5GHz band. 802.11a uses an orthogonal frequency division multiplexing encoding scheme rather than FHSS or DSSS.
  • 802.11b (also referred to as 802.11 High Rate or Wi-Fi) — an extension to 802.11 that applies to wireless LANS and provides 11 Mbps transmission (with a fallback to 5.5, 2 and 1-Mbps) in the 2.4 GHz band. 802.11b uses only DSSS. 802.11b was a 1999 ratification to the original 802.11 standard, allowing wireless functionality comparable to Ethernet.
  • 802.11e — a wireless draft standard that defines the Quality of Service (QoS) support for LANs, and is an enhancement to the 802.11a and 802.11b wireless LAN (WLAN) specifications. 802.11e adds QoS features and multimedia support to the existing IEEE 802.11b and IEEE 802.11a wireless standards, while maintaining full backward compatibility with these standards.
  • 802.11g — applies to wireless LANs and is used for transmission over short distances at up to 54-Mbps in the 2.4 GHz bands.
  • 802.11n — 802.11n builds upon previous 802.11 standards by adding multiple-input multiple-output (MIMO). The additional transmitter and receiver antennas allow for increased data throughput through spatial multiplexing and increased range by exploiting the spatial diversity through coding schemes like Alamouti coding. The real speed would be 100 Mbit/s (even 250 Mbit/s in PHY level), and so up to 4-5 times faster than 802.11g.
  • 802.11ac — 802.11ac builds upon previous 802.11 standards, particularly the 802.11n standard, to deliver data rates of 433Mbps per spatial stream, or 1.3Gbps in a three-antenna (three stream) design. The 802.11ac specification operates only in the 5 GHz frequency range and features support for wider channels (80MHz and 160MHz) and beamforming capabilities by default to help achieve its higher wireless speeds.
  • 802.11ac Wave 2 — 802.11ac Wave 2 is an update for the original 802.11ac spec that uses MU-MIMO technology and other advancements to help increase theoretical maximum wireless speeds for the spec to 6.93 Gbps.
  • 802.11ad — 802.11ad is a wireless specification under development that will operate in the 60GHz frequency band and offer much higher transfer rates than previous 802.11 specs, with a theoretical maximum transfer rate of up to 7Gbps (Gigabits per second).
  • 802.11r -  802.11r, also called Fast Basic Service Set (BSS) Transition, supports VoWi-Fi handoff between access points to enable VoIP roaming on a Wi-Fi network with 802.1X authentication.
  • 802.1X — Not to be confused with 802.11x (which is the term used to describe the family of 802.11 standards) 802.1X is an IEEE standard for port-based Network Access Control that allows network administrators to restricted use of IEEE 802 LAN service access points to secure communication between authenticated and authorized devices. 

Is 5 GHz Wi-Fi Network Hardware Better than 2.4 GHz ?

Question: Is 5 GHz Wi-Fi Network Hardware Better than 2.4 GHz?

Wireless computer network equipment typically uses radio signals in either a 2.4 GHz range or a 5 GHz range. These numbers are advertised prominently on product packaging, but their meaning is often misunderstood. Is 5 GHz network hardware better than 2.4 GHz hardware just because it carries a bigger number?
Answer: No. 5 GHz hardware offers a few advantages over 2.4 GHz hardware, but in practice, 2.4 GHz is usually the better choice for home and other wireless local networks.

GHz and Network Speed

The GHz range of a wireless radio only partially relates to the speed of a wireless network. For example, 802.11a Wi-Fi hardware runs at 5 GHz but supports the same maximum data rate of 54 Mbps as standard 802.11g network that run at 2.4 GHz. A 5 GHz network can carry more data than a 2.4 GHz network assuming the electric power to the higher frequency radios is maintained at a higher level. However, some 802.11g network products match and even exceed this potential speed advantage of 5 GHz 802.11a by utilizing a pair of radios instead of one, increasing capacity up to 108 Mbps under the right conditions.
Advantage: Both

GHz and Network Range

The higher the frequency of a wireless signal, the shorter its range. Thus, 2.4 GHz networks cover a substantially larger range than 5 GHz wireless networks. In particular, the higher frequency wireless signals of 5 GHz networks do not penetrate solid objects nearly as well as do 2.4 GHz signals, limiting their reach inside homes. Advantage: 2.4 GHz.

GHz and Network Interference

You may notice your cordless phone, automatic garage door opener, or other home appliance also advertises 2.4 GHz signals on its packaging. Because this frequency range is commonly used in consumer products, it's more likely a 2.4 GHz home network will pick up interference from appliances than will a 5 GHz home network. Advantage: 5 GHz

GHz and Cost

Some people mistakenly believe 5 GHz network technology is newer or somehow more innovative than 2.4 GHz. In fact, both types of signaling have existed for many years and are both proven technologies. 802.11g Wi-Fi products that run at 2.4 GHz tend to cost less than 802.11a Wi-Fi products not because 802.11g is obsolete or less capable, but because 802.11g is much more popular and thus economical for manufacturers to support.
Advantage: 2.4 GHz

5 GHz vs 2.4 GHz - The Bottom Line

5 GHz and 2.4 GHz are different wireless signaling frequencies that each have advantages for computer networking. Higher frequency networks are not necessarily superior to lower frequency ones, however. So-called dual band hardware combines the best of both types of hardware by integrating both types of radios into the product.

Tuesday 13 May 2014

How To Write a New Partition Boot Sector To a Windows 7/8/Vista System Partition

If the partition boot sector becomes corrupted or misconfigured in some way, Windows will not be able to start properly, prompting an error like BOOTMGR is Missing very early in the boot process.
The solution to a damaged partition boot sector is to overwrite it with a new, properly configured one using the bootrec command.
Important: The following instructions apply to Windows 8, Windows 7, and Windows Vista. Boot sector issues also occur in Windows XP but the solution involves a different process. See How To Write a New Partition Boot Sector To a Windows XP System Partition for help.
Difficulty: Easy
Time Required: It'll take around 15 minutes to write a new partition boot sector to your Windows system partition.
Here's How:
  1. Start Advanced Startup Options (Windows 8) or System Recovery Options (Windows 7 & Vista).
  2. Open Command Prompt.

    Note: The Command Prompt available from the Advanced Startup Options and System Recovery Options menus is similar to the one available from within Windows and works very similarly between operating systems.
  3. At the prompt, type the bootrec command as shown below and then press Enter:
    bootrec /fixboot
    The bootrec command will write a new partition boot sector to the current system partition. Any configuration or corruption issues with the partition boot sector that might have existed are now corrected.
  4. You should see the following message at the command line:
    The operation completed successfully.
    and then a blinking cursor at the prompt.
  5. Restart your computer.
    Assuming that a partition boot sector issue was the only problem, Windows should start normally now. If not, continue to troubleshoot whatever specific issue you're seeing that's preventing Windows from booting normally.
    Important: Depending on how you started Advanced Startup Options or System Recovery Options, you may need to remove a disc or flash drive before restarting.

More About Partition Boot Sectors

Sunday 16 March 2014

Dual Boot Options changing Windows Boot Loader Windows 7 and 8

If you want to Dual Boot Windows 7 and Windows 8 and have already successfully set this up you will find that Windows 8 is the default option to start up.
You can in the blue Windows start screen opt for either Windows 7 or Windows 8 as the default.
Changing to Windows 7 you will on the next start get a DOS black screen with the same option to select but not the option to change the default.
If you go to Run and type _msconfig in Windows 7 and then delect Boot_you can set the default and the timeout.
Be careful as you can also delete an option to boot the other Windows start option  here too.

GUI Boot loader editor for Windows 7

When multiple Operating Systems installed with Windows 7 then editing boot loader is not easy as Windows XP.  This small post shows how to use free GUI Boot loader editor for Windows 7 to easily manage and edit boot options.
In windows 7 Boot loader  called ‘ Boot Configuration Data (BCD)’ and its having complete command line utility. Though command line utility works well, but GUI is easy to work.  In earlier Operating Systems editing boot loader options, such as changing boot order, timeout, display name, disks and partitions numbers can be done easily by going to Startup and Recovery settings under advanced system properties, then open like text editor. But Windows 7 is not having same option.
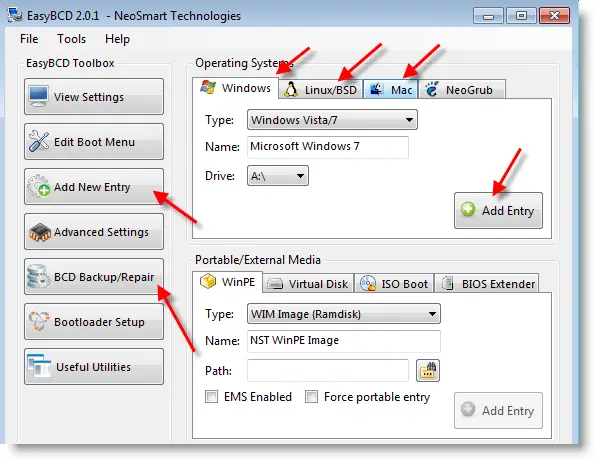
A free GUI boot loader editor called ‘EasyBCD’ does the job easily here.
Download latest EasyBCD editor here.
Open program after installation.
First display will be the current configuration.
Waiting time to select OS ( Timeout) in Windows 7 can be changed under ‘Edit Boot Menu’
Free GUI Boot Loader Editor for Windows 7
New entry to current boot loader can be added as shown below. ( Linux, Mac and NeoGrub OS entries supported)
Free GUI Boot Loader Editor for Windows 7
I highly recommend to Backup existing BCD before modifying.

Saturday 15 March 2014

Windows 7 won't shut down just restarts.

After reading just about every solution regarding the problem of shutting down my PC ( a NUC) I have discovered the cause.
To set up the NUC and install programs I had it connected to my normal monitor and keyboard using a KVMP switch made by Aten.
Windows 7 was taking about 5 minutes to shut down and when it did would restart.
Disconnecting from the KVMP and it shuts down almost instantly and doesn't restart.
I have no idea why.

Friday 14 March 2014

First try disabling Logitech Smooth scrolling in Chrome  also SmoothScroll add in.

How smooth is it? Pixel smooth. Without Smooth Scrolling, web pages typically scroll in choppy three-line increments. With Smooth Scrolling web pages will glide across your screen in single-pixel increments. It's so smooth you can even read as you scroll.

* Requirements
- Logitech SetPoint software 6.60 and above
- Windows 7 or Windows 8
- Logitech mouse or touchpad. Logitech gaming mice are not supported.

                      
Those of you who have Smooth Scrolling and Zooming problem on ALL LOGITECH MOUSE, here is a fix!!!
SOFTWARE ENGINEERS please fix this issue, rather than telling people to uninstall Logitech Setpoint Plugin on Chrome and on other browser.This guide will turn off CTRL+Mouse Scroll, smooth scroll is in effect, you can still zoom in and out by using CTRL +/-. and still enjoy smooth scrolling. I use this for my M705 Marathon Mouse because it also has Smooth Scrolling Physical Mouse Scroll. (no more redness on my index finger)

1. download Autohotkey, then install it off course. (take note of where you install it)
2. launch it.
3. after launching it you will see the small "H"(autohotkey icon on the lower right of your monitor beside the clock) and "rightclick on it" then choose "edit this script".
4.A notepad will pop-up then add the script below at he BOTTOM of the notepad.

Just copy paste this exactly in the notepad:

#IfWinActive ahk_class Chrome_WidgetWin_1
{
^WheelDown::return
^WheelUp::return
#MaxHotkeysPerInterval 1000
}

5. Close the notepad and save it.

Now we have to make autohotkey launch automatically when windows 8 boots up.
6. Make a shortcut of the "autohotkey.exe" go to the folder where you installed it then
"right click>send to>desktop create a shortcut"
7. Go to the desktop then right click on the shortcut then choose "cut".
8. Now open windows explorer by pressing "Windows key + E" at the same time.
9. Copy and Paste this:
C:\ProgramData\Microsoft\Windows\Start Menu\Programs\Startup
on the "Explorer address bar". then press ENTER.
10. Right click on the folder and "paste". Close the Windows Explorer Folder< then restart.

This autohotkey is a small software will not slow down your PC and it is an Open Source software and free.
and it has no virus not spayware, if you don't know autohotkey, may be you came from the moon.
here is the link (edit out third party link)

Please Logitech look into this PROBLEM so we  customers and you as a company will benefit from it in the long run. Fix this already.

Just want to help Logitech customers like me.

Change from AHCI to IDE


Change from AHCI to IDE Mode after Installation
Instruction:
 
•Exit all Windows-based programs.
•Press [Win] + R or take the RUN option from the start menu.
•Now type regedit there and press Enter Key to open up the Registry Editor Window.
•If you receive the User Account Control dialog box, click Continue.
•Locate and then click the following registry subkey:
HKEY_LOCAL_MACHINE\System\CurrentControlSet\Servic es\Pciide
•In the right pane, right-click Start in the Name column, and then click Modify.
•In the Value data box, type 0 [3 is default], and then click OK.
•On the File menu, click Exit to close Registry Editor.
•Restart your computer
•Go to BIOS and enable IDE, Save & Reboot
•Another restart will be required to finish the driver installation.

Alternatively
 Just download this Reg File and double-click to implement IDE on your Windows-based computer.
 Just remember to do the BIOS switch as well when you reboot.


When you're done, follow these instructions to go back to AHCI mode:

Quote:
Change from IDE to AHCI Mode after Installation
Information: AHCI stand for Advance Host Controller Interface. AHCI is a hardware mechanism that allows software to communicate with Serial ATA (SATA) devices (such as host bus adapters) that are designed to offer features not offered by Parallel ATA (PATA) controllers, such as: •Hot-Plugging
•Native Command Queuing (NCQ) -might improve computer/system/hard disk responsiveness, especially in multi-tasking environment
 You can read more about AHCI mode HERE
Instruction: There is one way to fix this, although you need to have knowledge of registry editing.
 The detailed steps from Microsoft website are as follows:
•Exit all Windows-based programs.
•Press [Win] + R or take the RUN option from the start menu.
•Now type regedit there and press Enter Key to open up the Registry Editor Window.
•If you receive the User Account Control dialog box, click Continue.
•Locate and then click the following registry subkey:
HKEY_LOCAL_MACHINE\System\CurrentControlSet\Servic es\msahci
•In the right pane, right-click Start in the Name column, and then click Modify.

•In the Value data box, type 0 [3 is default], and then click OK.

•On the File menu, click Exit to close Registry Editor.
•Restart your computer
•Go to BIOS and enable AHCI, Save & Reboot
•Another restart will be required to finish the driver installation.

Alternatively
 Just download this Reg File and double-click to implement AHCI on your Windows-based computer.
 Just remember to do the BIOS switch as well when you reboot.

Bluetooth Pairing of Apple Keyboard or Mouse with Windows PC

You may find that it is very difficult to achieve pairing of an Apple keyboard, mouse or trackpad.
First make sure they are not already paired with another device .
You can unpair them or switch off Bluetooth on the other devices.
I found that the mouse was easily paired using Control Panel _Hardware & Sound _Devices & Printers_Add a Device  (Windows 7)
Ensure that you select pairing in Windows  first then switch the mouse or keyboard on.
They only seem to try to connect for a very short period of time.
The keyboard will ask for a pairing code which again has to be entered fairly quickly and remember to press the ENTER key. If successful the notification bar will report adding device.
If they don't show up or the keyboard fails to present a pairing code option check again that it is not currently paired with another device.
Compared to Logitech Wireless Unifying mouse and keyboard it is very difficult.
I am fed up of having to constantly pair up devices over and over again.
My preference is for a wired mouse and keyboard every time.
-------------------------------------------------------------------------------------------------------------

Friday 7 March 2014

Has your Music Library disappeared from iTunes

After spending weeks during the Winter copying music CD's onto my iMac having decided to go entirely digital on the Cloud and getting rid of my CD collection to the charity shop...Disaster.
I switched on my Mac and went into the library and there was only one recent purchase showing from the iTunes store.
About 35 GB of music had just gone. Not to worry I had the trusty old iMac Time Machine App to get it all back. Going back a couple of days there it all was so I just clicked "Restore" and there was evidence that the files were being copied back.
On completion still no library. With panic setting in I tried it all again but same result.
The third time I went back in the Time Machine I noticed that the iTunes Media Library had moved in the Folder Structure.
I had recently installed a Synology NAS DS214Play as my own Network Server, ("Build your own Cloud"). Not fully understanding the Synology Apps I had selected one that controls your ITunes Library but couldn't seem to get it to work.
It was this that had moved the iTunes location as below.

Notice it is under the Main Folder ....USER(your user name)_Music-iTunes-ITunes Media-Music-then the tracks are listed.
This did not populate the Library in iTunes


This is how it should look. Just Drag the Music Folder from Column 2 into Column 1 on to the Music symbol and the tree structure is correct again.


I am not sure why the Time Machine restore didn't do that but instantly your Library re-appears
I hope this helps someone who has the same problem
 
________________________________________


Wednesday 5 March 2014

Change the Default Save Folder for Windows 7 Libraries to Something Else (Like Your Dropbox)

Have you ever noticed that when you save a file into a Windows 7 library through the common “Save As” dialog, that it ends up in just one of the folders that make up that library? Here’s how to customize the default save location for any library.
As an example, if you were to save a Word document using the Save As dialog, it would end up in your My Documents folder by default. But what if you would prefer that the files get saved somewhere else? Like one of your Dropbox folders, for instance?
image

Changing Default Save Location: Method 1

You can simply click the “Includes 3 locations” in the Open/Save dialog to make your way into the quick properties window.
From here, you can easily add or remove library locations, and if you right-click on one of them, you can choose “Set as default save location”. Useful!

Changing Default Save Location: Method 2

You can also head in Windows Explorer down to the Libraries section, right-click on any of the libraries, and choose Properties.
This will take you into the extended library properties window, where you can add or remove locations, and click the Set save location to set the default.
You’ll note in the screenshots above that I’ve included my Dropbox documents folder—this is a really great way to include your Dropbox folders in the default libraries, and set the default location as your Dropbox instead of the regular folders.
Note: while we used Documents library as the example here, this should work for all libraries.
_________________________

Tuesday 4 March 2014

Create a Bootable USB Windows 7 Installation Stick

The Microsoft Windows 7 USB/DVD Download Tool will create a bootable USB Stick minimum size 4 GB.
Unfortunately it only works on an ISO image purchased through the Microsoft Store,
If you have a situation like me where you have bought Windows 7 on a DVD and you want to install it on a Intel NUC which doesn't have a DVD drive this is what you do.

_________________________________________________________________________
Procedure

Open a cmd (DOS Box) with administrator privileges. Start_Run_type cmd_ENTER
Insert your 4 GB USB Drive.
Do the following and  Press ENTER after each line below watching for conformation)
Type DISKPART
LIST DISK (carefully look for the capacity of the USB Drive or you could wipe your hard drive)
SELECT DISK n (where n is the Disk number of the USB )
CLEAN
CREATE PARTITION PRIMARY
SELECT PARTITION 1 (this is partition 1 on DISK n)
ACTIVE
FORMAT FS=NTFS  QUICK (this could take 30 minutes  without quick)
on completion of format
ASSIGN
EXIT.

Keep the cmd window open
Insert the Windows 7/Vista DVD and note down the drive letter of the DVD drive.
Assuming DVD drive is D: and the USB drive is G:.
Navigate to the directory where bootsect is found.
D:
cd d:\boot

Use the bootsect to make the USB Drive bootable. This updates the drive with BOOTMGR compatible code and prepares it to boot Windows 7/Vista.

BOOTSECT.EXE/NT60 G:
  • Close the Command Prompt windows.
  •  Your USB Key is now ready to add the Installation files

    You can now put in your Windows Install DVD into the Drive). If it Autostarts cancel and the OPEN in Explorer. (My Computer)
    Open another Window in My Computer for the USB Drive
    Go back to the DVD drive and select all the files showing. Select ALL and COPY
    Go to the USB drive and PASTE
    Wait about 30 minutes again and EXIT.

    Ensure the BIOS is set for USB booting.
    With the USB drive still in place, RESTART the PC (press the Boot Options F10 or F12 usually, to SELECT USB Booting)
    The Drive should now enable the Windows logo to start up and then the Install Options.

    Other ways of doing it

    http://m.wikihow.com/Create-a-Bootable-Windows-7-or-Vista-USB-Drive

    ___________________________________________________________________________
    ___________________________________________________________________________

    Friday 28 February 2014

    What is the point of using an iTunes Server on a NAS such as Synology DS214Play

    Trying to set Up a Synology DS214Play NAS Server. I clicked on a few bundled appplications including iTunes server. My Network is about 4Pc's plus an iMac.
    The iMac is my Master Station for Music. All CD's are imported on it and iTunes Store Purchases.
    When I came to set up the Synology Cloud Station which syncs Music, Video, Photos between networked devices on the iMac I noticed lots of activity and the Music Sync Folder filling up.
    Next day switching on the iMac and going to iTunes all the library of 26GB of music had gone together with playlists.
    I was able to go into the Time Machine App and restore back to yesterday and the music started reloading but still did not appear in iTunes.
    I then found that "Music" had moved from the normal position in Finder to User and the iTunes Folder structure was there.
    Moving the "Music " folder back to the previous position in Finder reinstated my Library in iTunes

    Alternative methods for sorting out the iTunes library were found.

    In the Previous iTunes Libraries folder should be a number of dated iTunes Library files. Take the most recent of these and copy it into the iTunes folder. Rename iTunes Library.itl as iTunes Library (Corrupt).itl and then rename the restored file as iTunes Library.itl. Start iTunes. Should all be good, bar any recent additions to or deletions from your library.Alternatively, depending on exactly when and why the library went missing, there may be a more recent .tmp file in the main iTunes folder that can be renamed as iTunes Library.itl to restore the library to a recent state  See iTunes Folder Watch for a tool to catch up with any changes since the backup file was created.When you get it all working make a backup
     Should you be in the unfortunate position where you are no longer able to access your original library, or a backup of it, then see Recover your iTunes library from your iPod or iOS device

     
    I've noticed more of these missing library posts of late and a common factor to most since I started asking is AVG Anti-Virus. It seems in some cases it might be at least part of the reason why the library file disappears. Try excluding the iTunes folder from any AV scanning process.

    I do query the point of having iTunes on the Server.
    Response from a Forum
    You experience is almost exactly the same as mine and you are asking the exact same question. And as you may have already gathered from this thread, there appears to be o point whatsoever in the iTunes server. The approach I have taken is to change the setting in iTunes on my laptop to point directly to the folder on my NAS drive where I store all my music. Note that this is different to just adding a folder to the library. By doing this it means that the iTunes folder where iTunes stores it's database, apps, music, videos, etc will be on the NAS instead of on my local PC.
    However, to access your music and videos on apple devices through the native apps you still need to synchronise via iTunes so it will copy the files to your device. This of course means that you cannot access all your music/videos from your iPad/iPhone if you have a large volume of media as it will not all fit.
    The only way to access all your media from your ipad/iPhone is to use non-Apple apps. For example my NAS drive comes with an app that plays music and will access it all directly from the NAS. And I'm sure here are a number of third party apps that will do the same.
    So basically, my advice to you is to ignore the iTunes server, it is a complete waste and I feel sorry for the developers who built it, and third party companies such as those selling these NAS drives should stop using it as a marketing tool for their own products as it also reflects badly on them (in my opinion anyway).


    Monday 24 February 2014

    External Links to open a New tab

    Internal vs. External Links

    With Grateful thanks to Marianne......

    Links that take users to another page on the same website are internal links. Internal links should never open in new browser tabs, but rather the same tab the user is on. Opening new tabs of the same website is redundant and confusing for users. If it’s the same website but a different page, the site’s navigation menu is still visible to users. They can simply use the menu to navigate back or elsewhere if they need. Keeping users in the same tab also helps them better understand the navigation flow of your site. Therefore, it doesn’t make sense to open new tabs if the links take users to the same website.

    External links, however, should open in new tabs. These links take users to a different website. Many designers make the mistake of opening external links in the same tab. There are many problems with this that designers need to know about, you are left with no return if you close the external link page. To retain an open tab back to your site use the


    All you have to do is add "target=_blank" right after the URL to which you are linking. This opens a brand new tab and a new window. To get back to your site, all your visitor has to do is click the tab with your site open.
    Now, you might be thinking to yourself, "I can use that all the time!" If you use this code on every single one of your links that simply links to another page in your site, then the visitor will wind up having several of your site's pages open in several different tabs and windows.
    While you might think that's a great way to allow an easy means for your visitors to go back to already visited pages, your visitors might view that as an extreme annoyance. If each of your links opens a new window that means your visitor will have to close each of those new windows. The annoyance factor on that alone could drive the visitor away from your site forever.
    If you are concerned that your visitor is a web newbie and they aren't sure about the Back button, then by all means make sure that you have links on your page so that the visitor can easily find their way back to where they were. Once upon a time, many sites relied on breadcrumb trails so that a visitor could visually see, and click, back to where they were.
    This practice died off due to many questions on the trails purpose and how they worked. The best practice is to ensure that you have clear and obvious links along either the top of the page or running along the left side of the page. That way, the visitor does not need the Back button, you don't need an unintentionally confusing breadcrumb path and you most certainly do not need to use "target=_blank" for each and every link.
    Use "target=_blank" judiciously and only for links that take your visitor to other sites. 


    Open a Page in a New Window


    To have a link in which, when a viewer presses it, will open a page in a new window, you need to listen to this:
    Insert something like this: within < and> of course. I can't type that here as it will convert the coding to the link only as open google in a new page. what you want is target=_blank.

    A HREF="http://www.google.com/" TARGET="_blank">Open Google in a New Window

    And look at what happens:
    Open Google in a New Window
    You see?


    Back-Button Fatigue
    When you open external links in the same tab, you create back-button fatigue for users. Every time the user goes to an external website they have to hit the back button to go back to your website. If they decide to click the links on the other website, they have to hit the back button even more times to get back to your site. This is a lot of unnecessary work for users.
    Opening an external link in a new tab allows users to explore the other site as much as they want without having to hit the back button again and again to go back to your site. All they need to do is click the tab your site is on. There’s no excessive back-button pressing or long wait times.